Our old bed was a brown leather bed that we purchased about 6 years ago we liked it back then but its just to dark especially with the bed side tables being a dark colour as well .........we also added 2 kittens to our family last year who also loved the bed head.
I was wanting some thing classic so I found a few pictures as inspiration for my design.
This was may favorite !
I also like this one
This one

And this one
I love all of these but decided to go with the bed from hardware restoration! I went to there website for dimensions to get the height however it would have been to tall for my room so I made it a little shorter maybe 5 or 10 cm shorter :)
With a plan in hand off we went to the hardware store :)
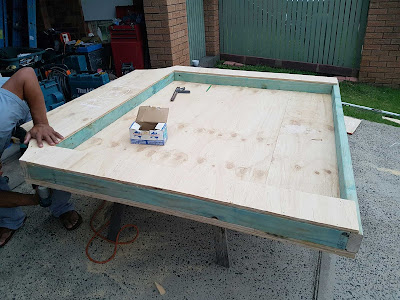
Firstly we cut the width of the ply to size and worked out the angle for the corner cut out.
Now that both sides are done we started making the frame.... Now this bed head is going on a gas lift bed frame so we need to make it quite strong to hold the weight.
Attaching the frame to the ply wood
We then marked out the where the holes go for the buttons.
On the back of the bed we framed up the top and sides for strength and to get the depth I wanted and also for something for me to staple too.
On the front we made a boarder from 12mm ply for where the foam would go into making it wide enough to the stud strip to go on to also.
We used thin mdf board on the cut out angle
Next I used half inch foam and marked out where I need to cut. I brought this foam for a upholstery store for around $25 for a 2*2 m piece.
once the foam is glued down, I used a fabric adhesive spray I brought from spot light I covered the whole frame with wadding.
I haven't shown many fabric pics but I purchased fabric from spotlight on sale and it came in 3 m wide which is great! and I purchase 4 meters because I am also covering the foot and sides of the bed frame. Once I worked out dimensions ( High * Width * Depth + over hang) I cut it out and placed it over the bed and got ready to go staple crazy!
covering the bed was quite simple and its easy to pull the staples out and re staple if needed. I did it many times!!
Next I marked out where the stud strips go ( I brought 5 meters for around $35) and hammered them in.
Next was getting the buttons ready for covering. I had some left over from a job I had done I think I brought them from etsy but you can also bye them from spot light. The size I used was a 36.
Next step, because I'm having a piped edge I made a side strip with the piping strip attached, this was the first time I'd done pipping..... I watched a lot of u tube videos to work out what a had to do. I forgot to take pictures :( If your crafty on the sewing machine you should be able to work it out.
The below picture is the strip with the piping attached but is facing down ready for me to staple on the head board.
starting to staple it on..... next pic you'll see what I'm talking about! (hopefully)
Sides are all done
Now just a matter of stapling the fabric to the back.
I haven't yet but I'm going to buy cheap black fabric to cover the back of the bed.
Once I marked out where the buttons are to go on the front I was able to come through from the back with a big needle and upholstery thread and get the exact position to make sure everything was lined up :)
Threads hanging out ready for me to tension and staple.
By this time I felt like a pro upholsterer haha! I think I was scaring hubby a Bit with the way I was stapling away. Their were a few close calls 😨
Voila! All done...... well the head board part.
we were up till 2 am putting it back together on a Friday morning (oops)
{{BEFORE}}
{{AFTER}}
Here's the finished product with the sides and foot covered. Not bad if I do say so myself :)
To buy the hardware restoration bed it would have cost approx $4220 (yikes!!)
Fabric $100
Timber $120
Foam and wadding $55
studs $ 35
Buttons & thread $10
Blood, sweat and tears $0
Total $320
I hope I've inspired someone :)
Alicia
xx
**Affiliate links used
.


No comments:
Post a Comment